Router Setup
The router is responsible for setting up the local network used by all components of the robot to talk to each other.
Unpacking the router
The router we are using in this project is a TP Link mini router TL-WR810N. When unpacking it, the box should contain:
- the router
- one micro-usb cable (used for powering the router)
- one ethernet cable (we will use it later to connect the raspberry pi to the router)
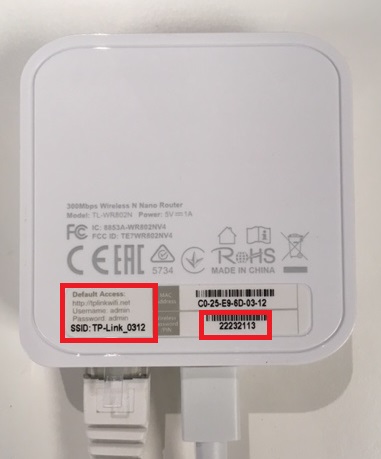 Prior to setting up the router, look at the back of it and note the SSID and password (they will be needed to connect to the router)
Connecting to the router
Power the router and, from your computer, connect to it via Wifi (The network id and password will be the one at the back of the router)
Once your computer is connected to the router local network, open a web browser and type 192.168.0.1 to access the router settings page. The browser should display the page below:
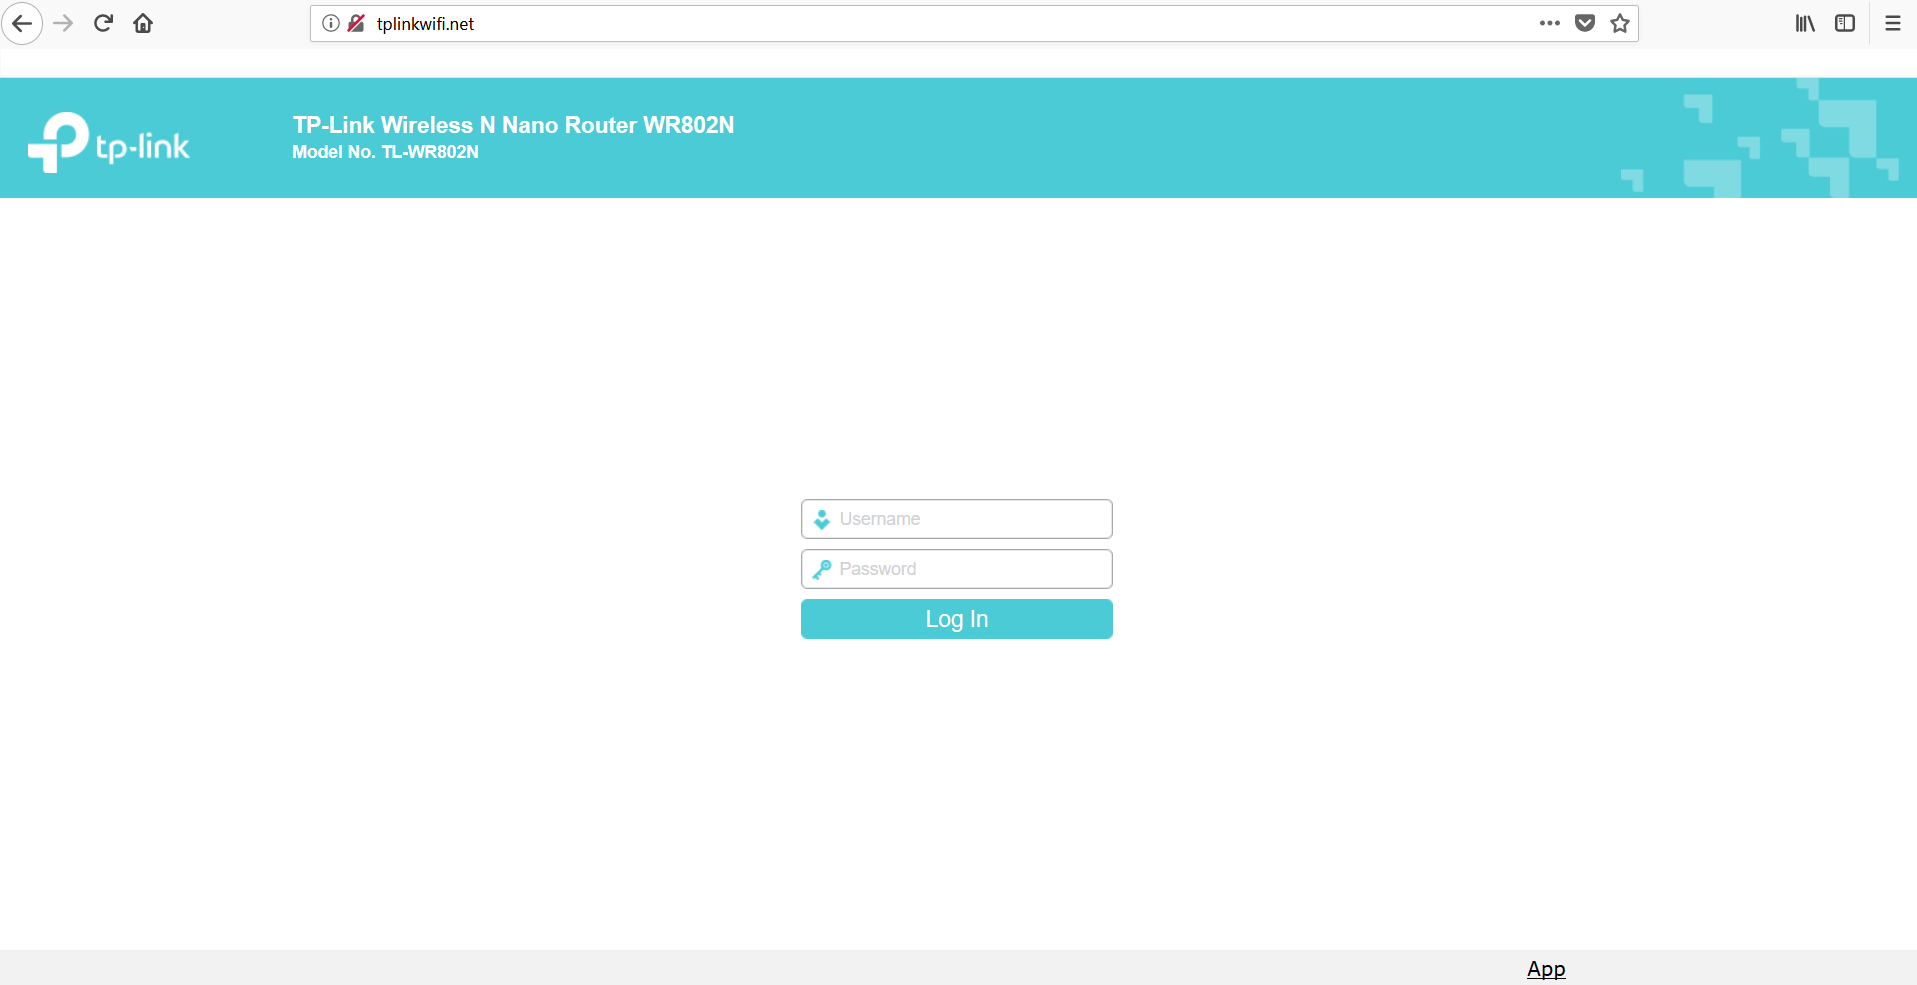
Enter the default login (admin) and password (admin) to access the router settings page.
Note: With the TP Link router, the interface can also be accessed by typing tplinkwifi.net/ in the browser. It is also possible to change the admin login and password from this interface (but not necessary for the robot to work).
Router settings
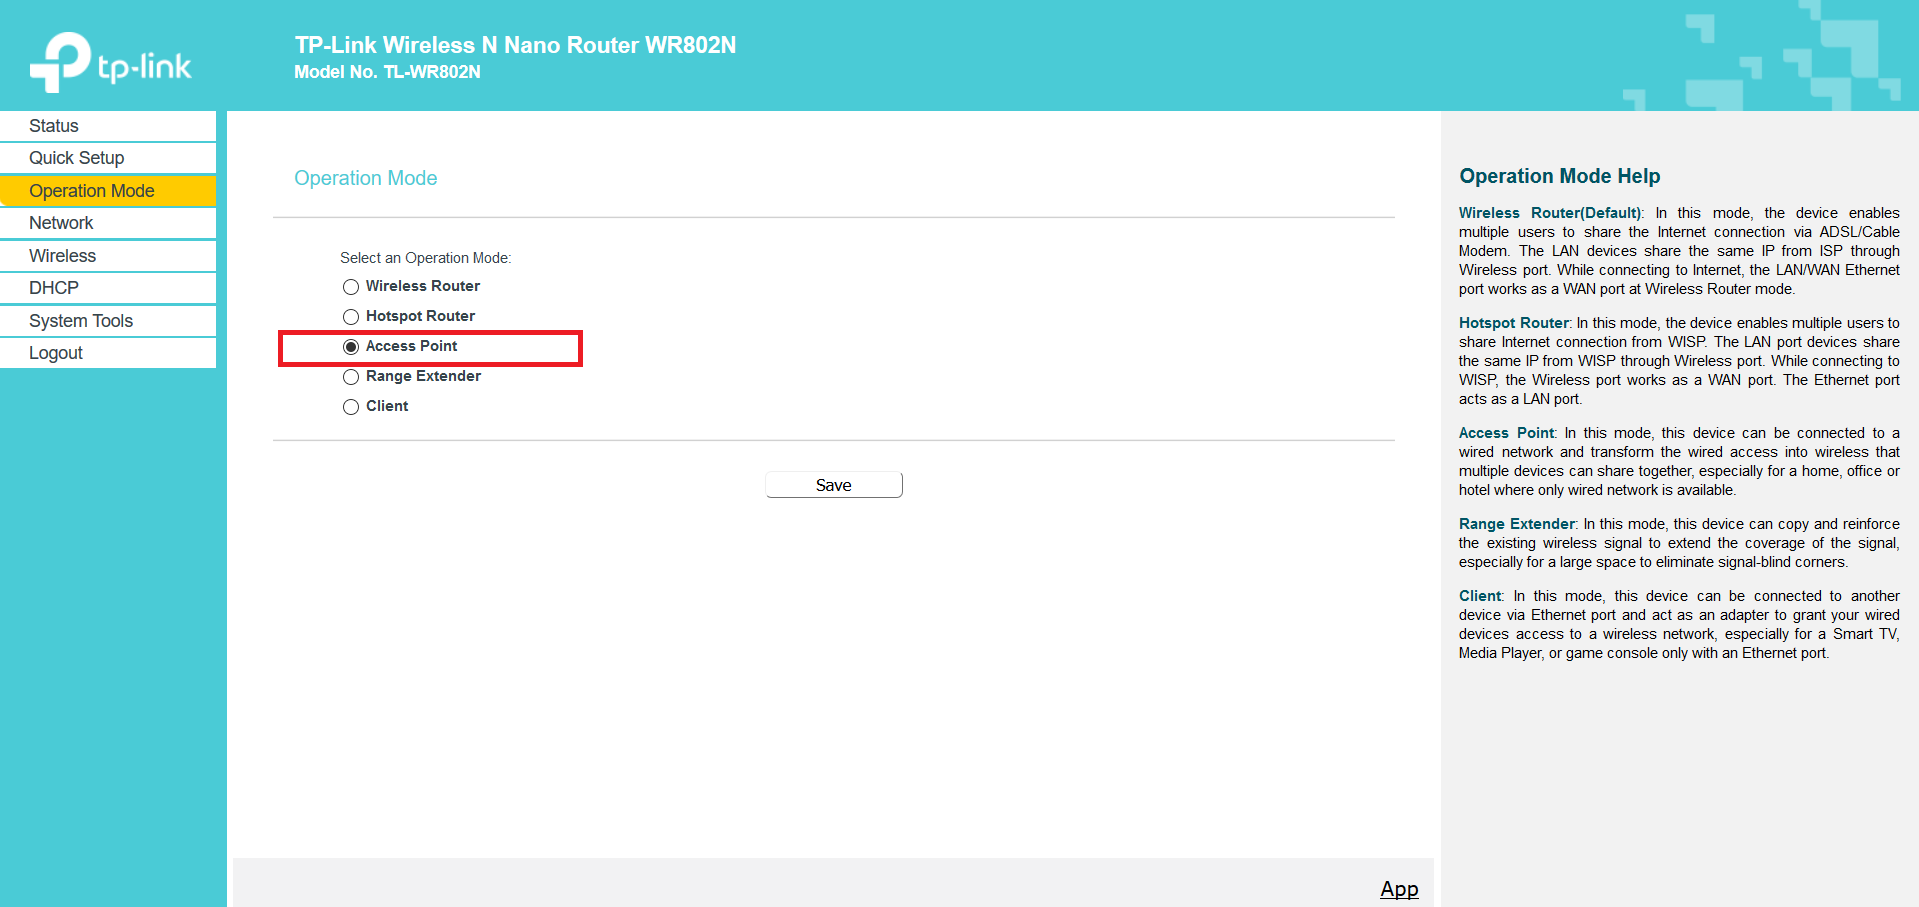
Once in the router settings interface, apply the settings below one by one:
Warning: These changes will prompt the router to restart. You will have to connect to it again before you can proceed.
- Set the Operation Mode as Access Point
- In Wireless->Basic Settings, change the network name (give it the name of your robot, for instance).
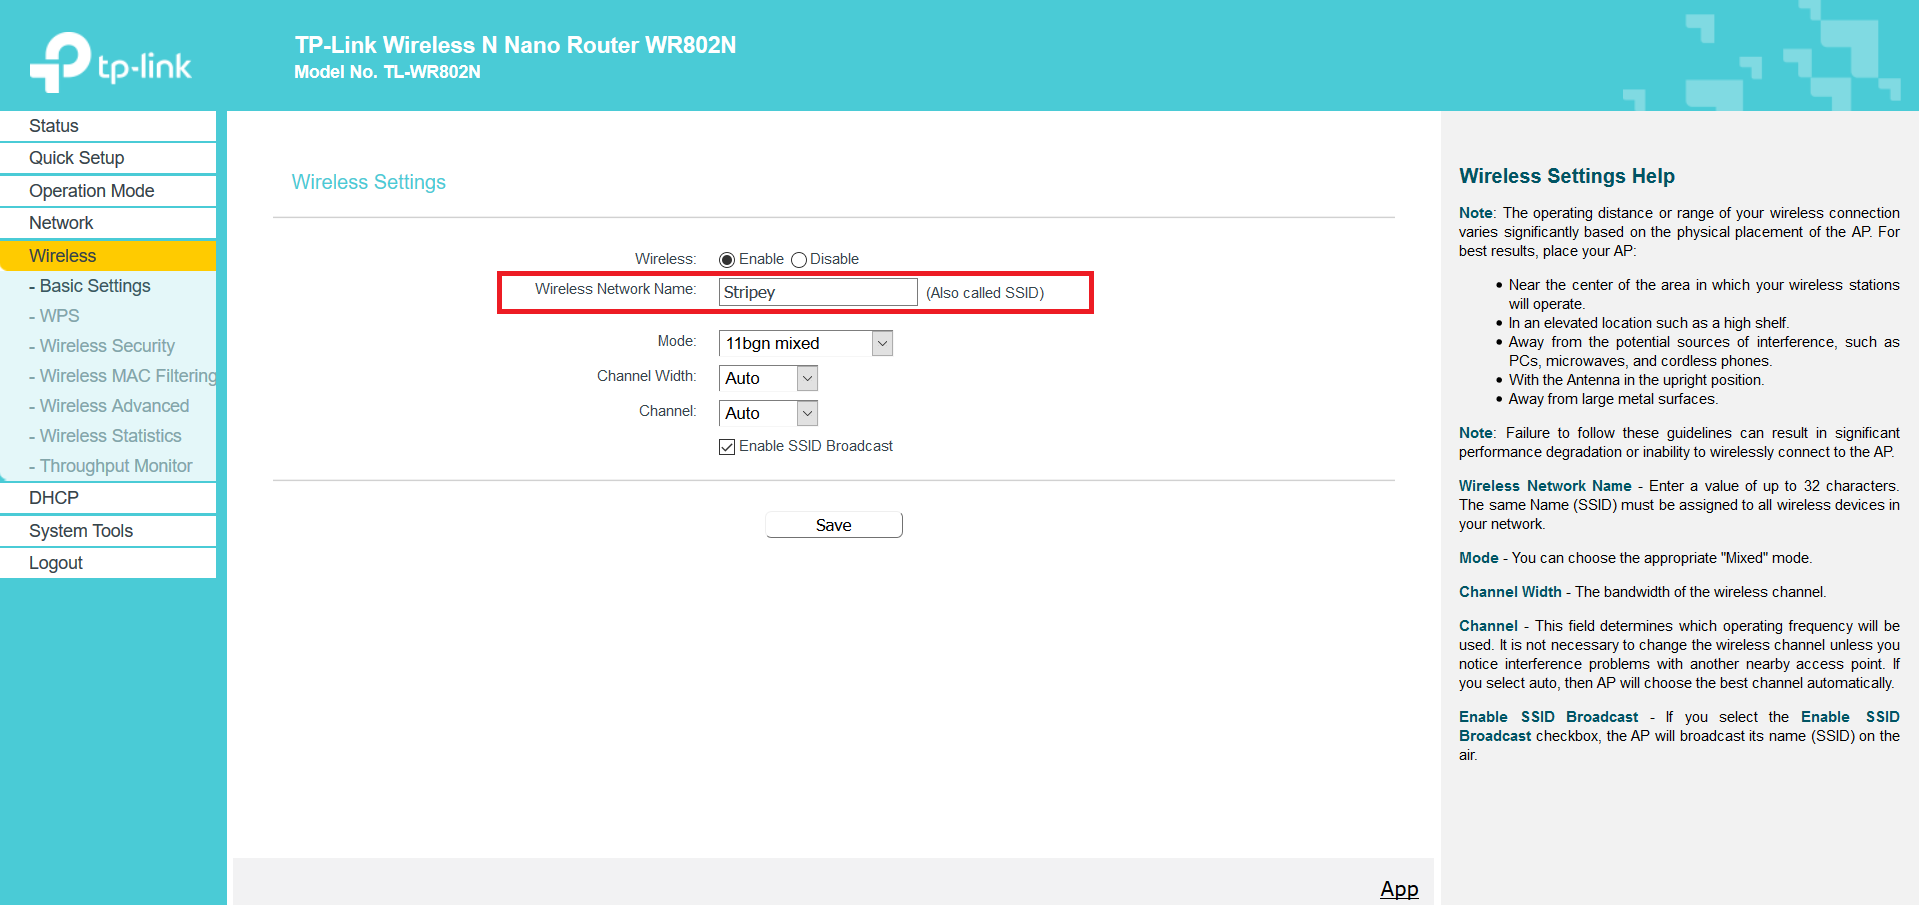
Note: Changing the name of the network is optional but recommended, as it helps identify the robot better. In addition, you can also change the network password in Wireless->Wireless Security
Address reservation for the Raspberry Pi
The Raspberry Pi has been set up in a previous step. To operate normally, the Pi needs to be use a static IP address on the network. This steps goes through adress reservation for the Pi.
-
Make sure the Raspberry Pi is off, and connect it to the router using the ethernet cable.
-
Turn on the Raspberry Pi.
-
On your computer, connect to the router admin interface and go to DHCP->DHCP Client List. You should see the raspberry pi in the list of the clients.
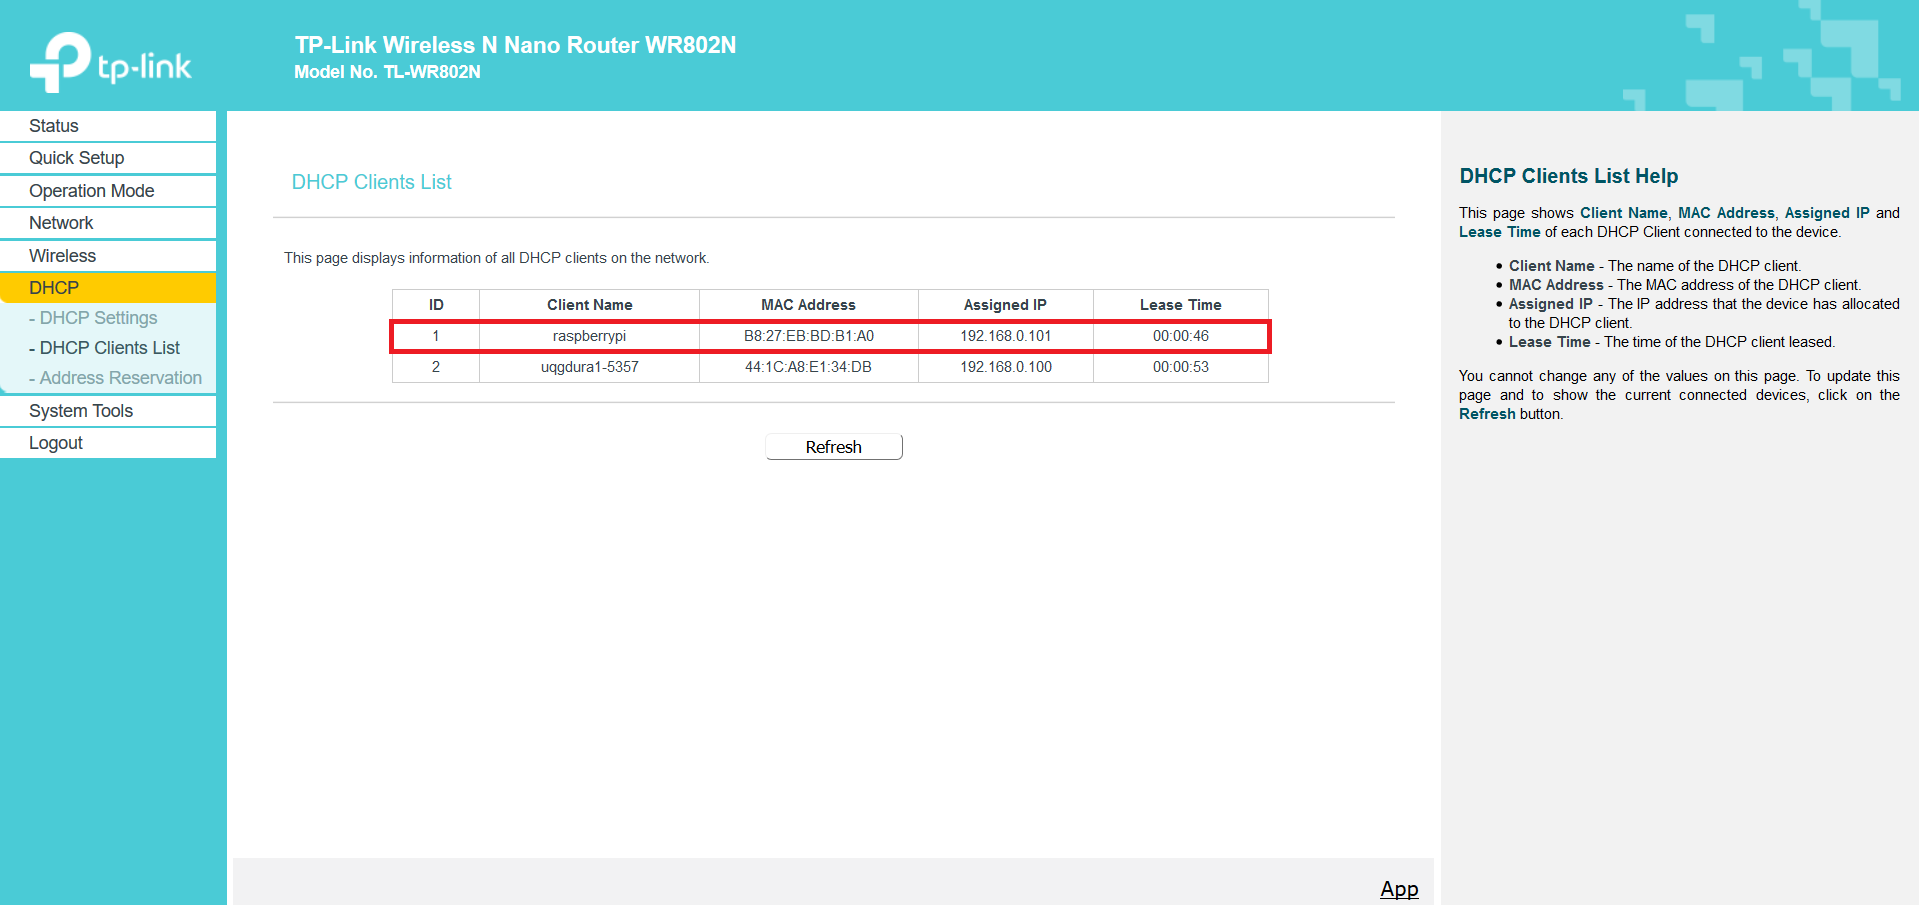
Note: The raspberry pi can take a minute or so to connect to the network. Hit Refresh if you can’t see it.
-
Copy the MAC address of the Raspberry Pi.
-
In DHCP->Address Reservation, hit Add New. Create a new address reservation by pasting the MAC address of the Raspberry Pi, setting its IP address to 192.168.0.2, and setting its status as Enabled
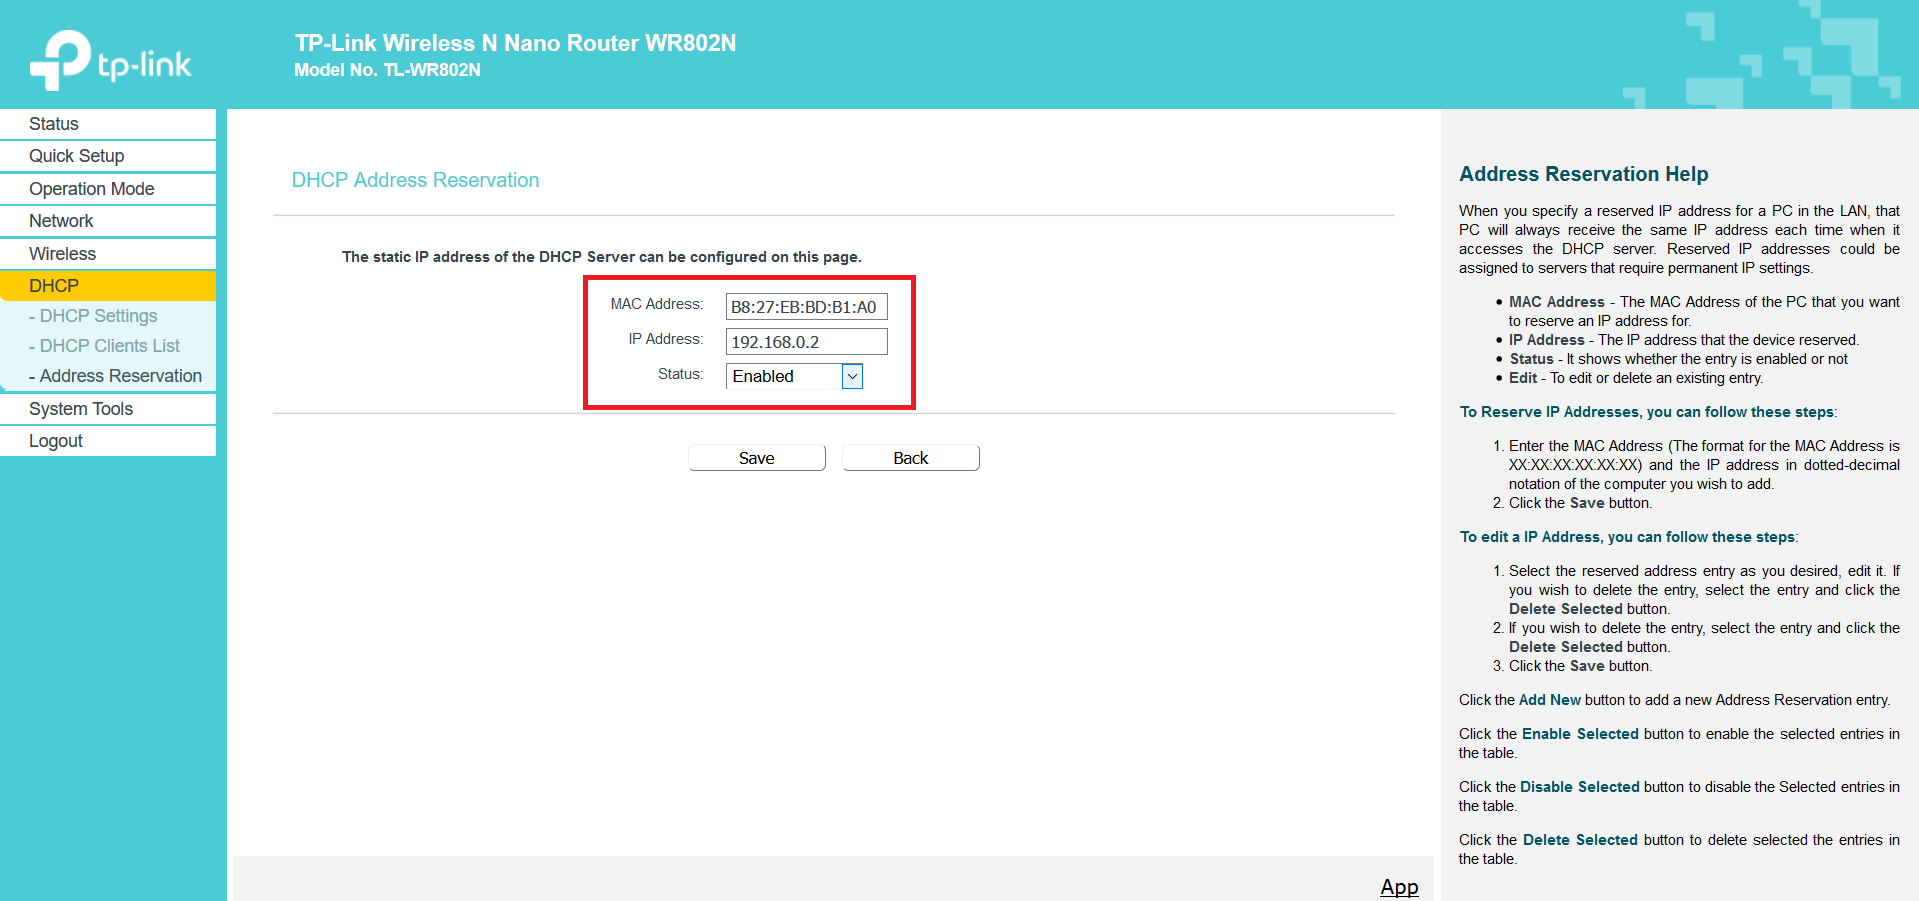
Warning: The address reservation will take effect only after restarting the router. Next time you restart the router, if you go to DHCP->DHCP Client List, the Raspberry Pi should be listed with an IP of 192.168.0.2 and a “permanent” lease time.
Once these steps are complete, you can proceed to setting up the Head tablet.