Set up
Overview
Git is a version control system, which helps us keep track of and coordinate changes to various files. GitLab is a Git hosting and web-based management service for projects using Git, and SourceTree is a multi-platform desktop client that makes interacting with Git and GitLab more convenient. So roughly speaking, SourceTree is to Git (the technology) and GitLab (a service provider) what desktop clients such as Microsoft Outlook are to e-mail (the technology) for and Gmail (a service provider).
Like e-mail, there are many service providers and desktop clients. For the Warlpiri dictionary project, we use this particular combination. Thus, screenshots in this onboarding document refer to these particular software and services (please do let us know if these screenshots and instructions become out of date).
Lastly, if you do not already have a strong preference for a text editor (e.g. TextWrangler, Notepad++), we also recommend downloading and using Sublime Text. Unlike TextWrangler (macOS-only) or Notepad++ (Windows-only), Sublime Text is cross-platform, so we will also use Sublime Text in various screenshots below.
Sublime Text
-
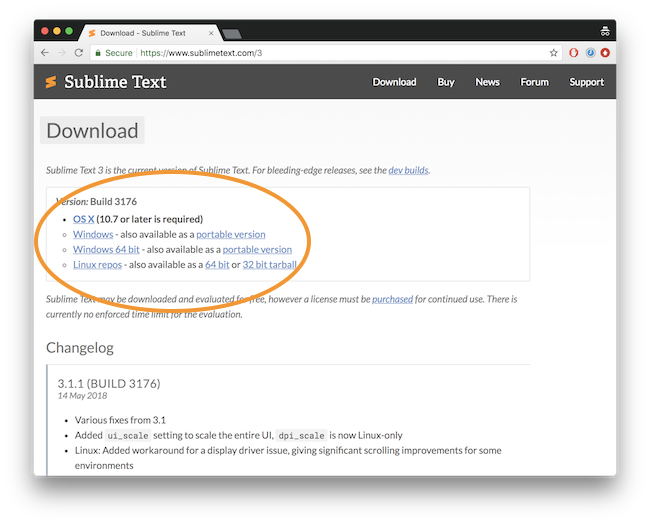
Go to https://www.sublimetext.com/3, where you’ll find various download links for Sublime Text. Click on the link relevant for your platform, e.g. OS X.
If you are on a relatively-modern Windows machine (post-2010), you will likely want the 64 bit version.
macOS
- In your Downloads folder (or where you chose to download the file), you will see a disk image such as
Sublime Text Build 3176.dmg. Open this file, and drag theSublime Text.appcontained in this image your Applications folder (a shortcut is usually provided within the image). - You can now unmount the disk image from your Devices list in the Finder window (the left menu where you would also unmount USB drives, etc.).
- Go to your Applications folder and double click on
Sublime Textto launch it.
Windows
- In your Downloads folder (or where you chose to download the file), you will see an application file named something along the lines of
Sublime Text Build 3176 x64 Setup.exe. Open the setup wizard and follow the instructions to install it in yourPorgram Files. Once complete, clickFinish. - The program will be available in your
Start Menu, and wherever you decide to create a shortcut. Click on theSublime Texticon to launch it.
SSH key generation
macOS
To generate a new SSH key pair on OS X:
-
Open up the Terminal app and enter the following command (replacing first.last@university.edu.au with your e-mail):
ssh-keygen -t rsa -C “first.last@university.edu.au” -b 4096
You will then be asked where you’d like to save the key. Hit Enter/Return to leave this as the default place (/Users/your-username/.ssh/id_rsa).
Enter a passphrase (minimum 5 characters) which you will be asked for anytime when interacting with the generated key, and hit Enter/Return.
-
You now need to copy and paste your public key to GitLab (you may skip ahead to create an account and do this step once you are prompted to enter your SSH key). To copy the public key (assuming you saved it in the default place), run the command:
pbcopy < ~/.ssh/id_rsa.pub
Windows
To generate an SSH key in Windows requires downloading a special program called puttygen.exe.
- Download
puttygen.exefrom “http://www.chiark.greenend.org.uk/~sgtatham/putty/latest.html” (get the 64-bit version unless you are using a very old machine). You can save it in your usual Downloads folder.
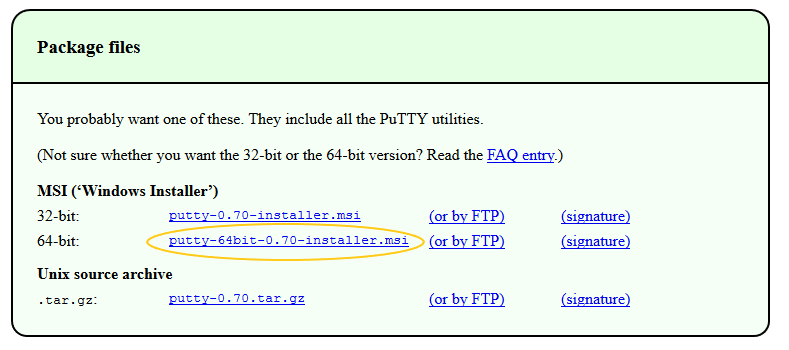
Download puttygen.exe
- Open
puttygen.exe. You should be faced with the following interface.
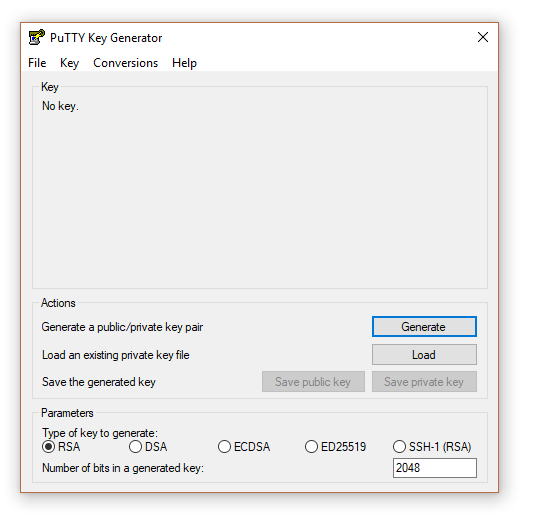
Open puttygen.exe
- From the top menu item
Key, make sureSSH-2 RSAis selected.
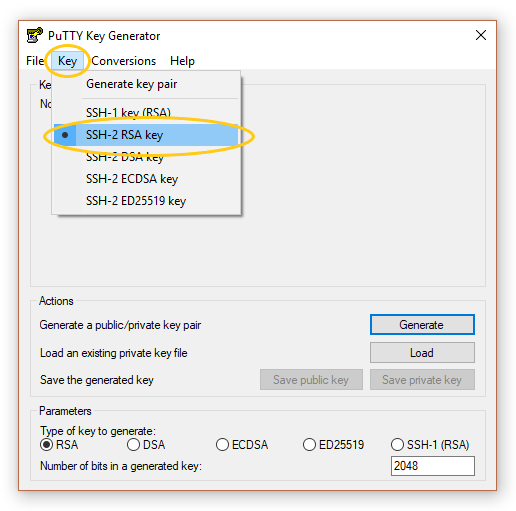
Confirm SSH-2 RSA
- In the bottom-right corner, enter
4096for theNumber of bits in generated key.
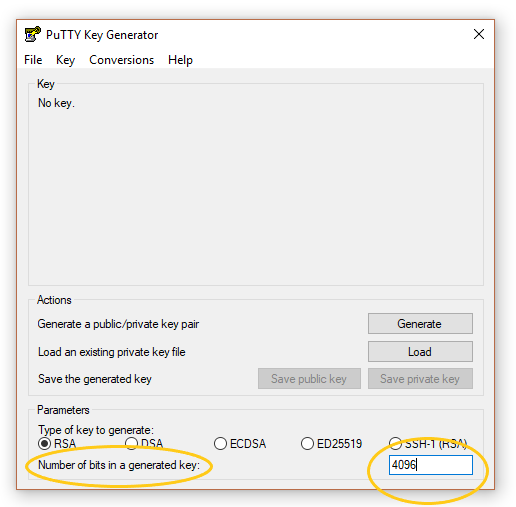
Enter number of bits
- Click generate and, as per the instructions on the interface, move the cursor around the blank space to provide some randomness.
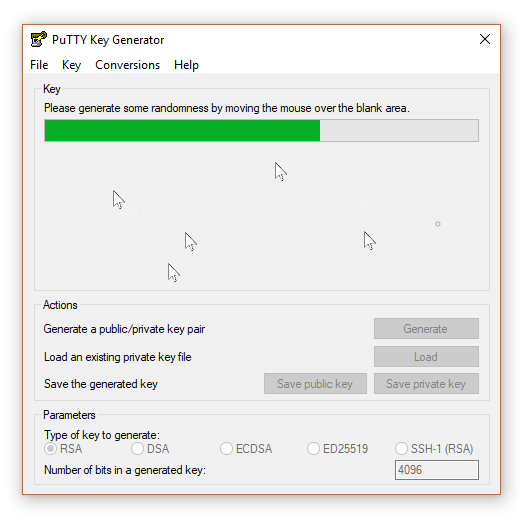
Generate key
- Once generated, enter a
Key passphrasewhich will be used to authenticate access to the private key in the future. There are no character restrictions, so use just use common sense as with generating any other password.
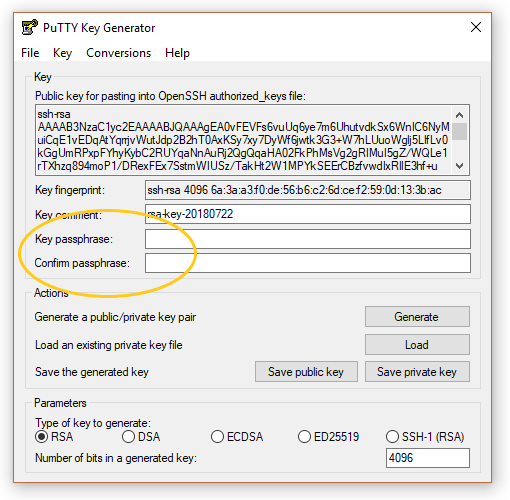
Enter passphrase
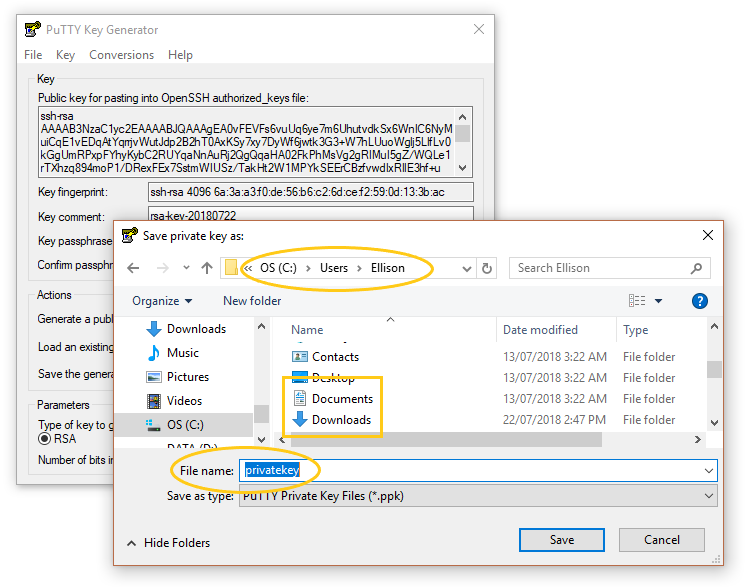
- Save the private key in your home directory (e.g.
C:\Users\your-name, orC:\Users\your-user-id). This directory should also contain yourDocumentsandDownloadsfolders.
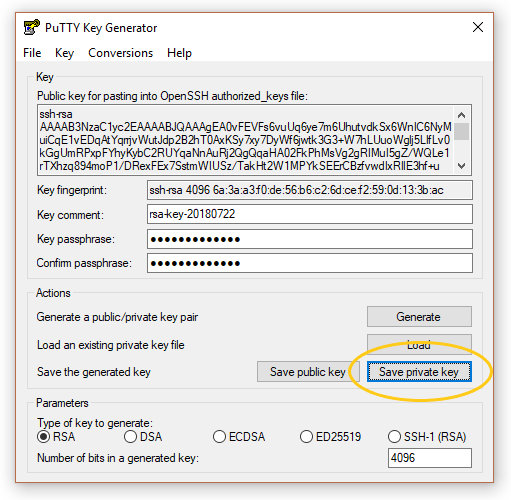
- Save the public key in the same place.
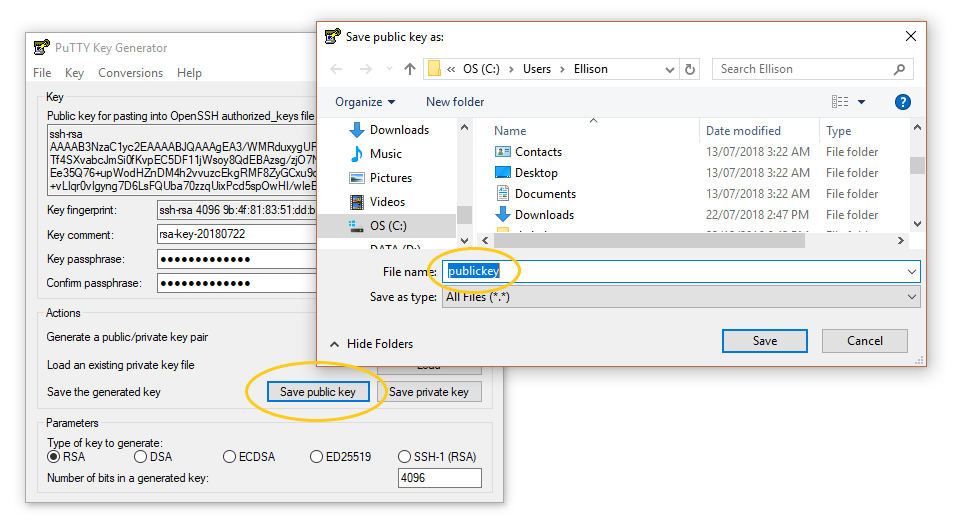
Save public key
- Copy the whole public key in the Key area ‘ssh-rsa …’. You will need the copied key for the next step (configuring GitLab).
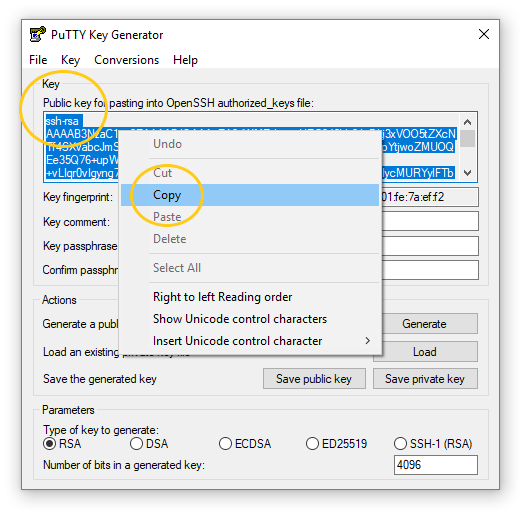
Copy public key
GitLab
- If you don’t already have a GitLab.com account, go to https://gitlab.com/users/sign_in and click the
Registertab in order to create a GitLab account.
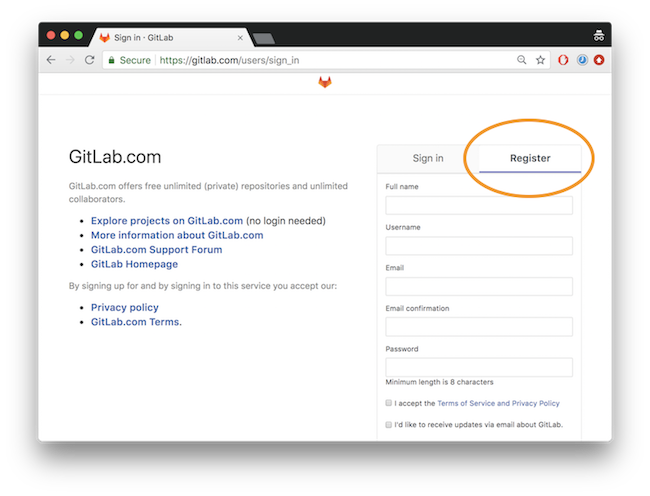
GitLab.com registration page
After the initial registration, you’ll be asked to confirm your e-mail address. So check the inbox of the e-mail you signed up with for an e-mail from GitLab with a link to their confirmation page.
After GitLab confirms your e-mail, you’ll be taken to the Sign In page again, where you may now sign in with your newly-created account.
Now we need to enter your SSH key under your account. Got to your
User settingsby clicking the icon on the top right and selectingSettings.
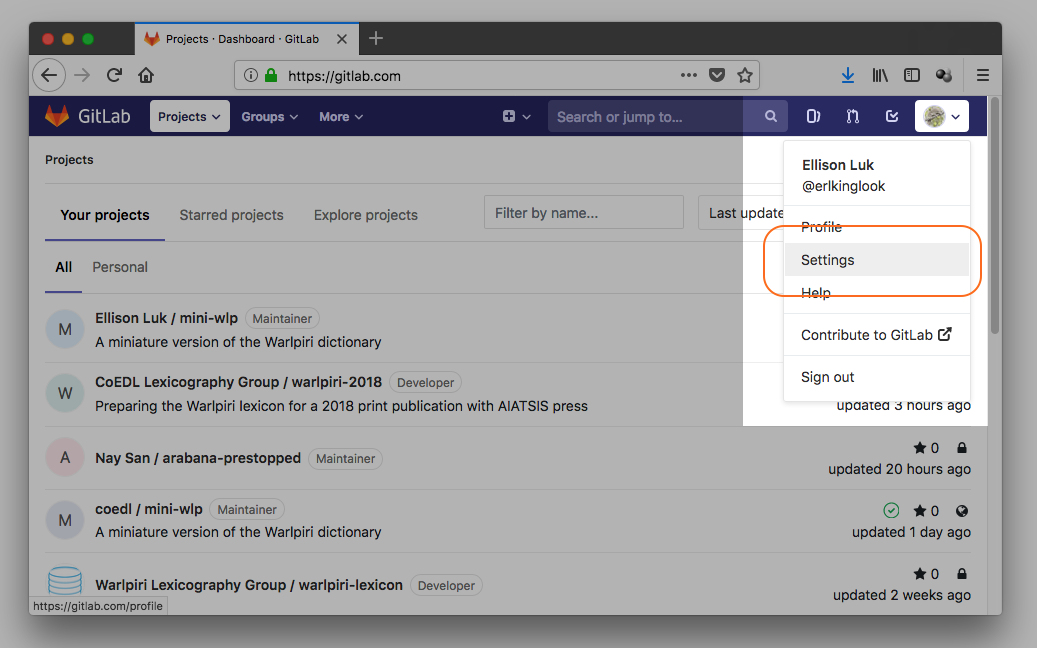
User settings
On the left sidebar, select SSH Keys.
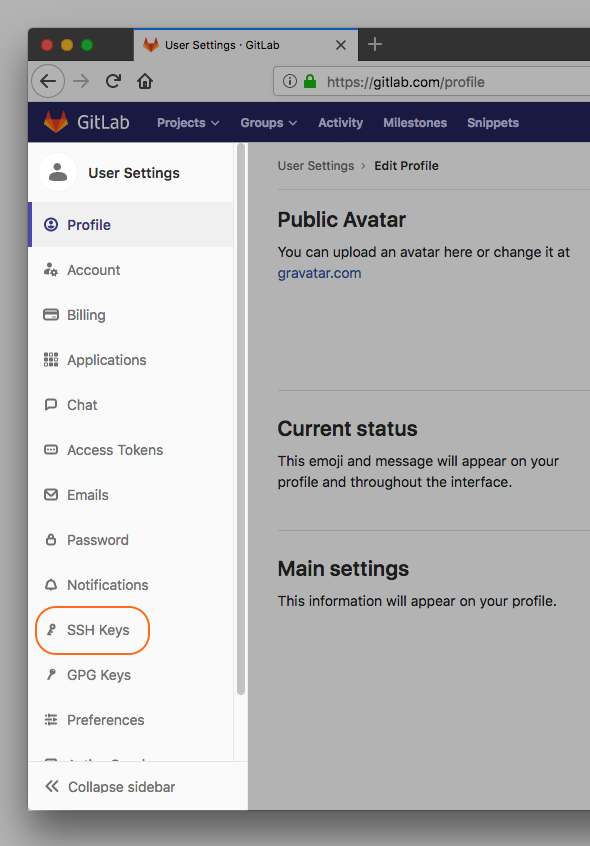
Sidebar
Copy your SSH key (from your generator), and paste it in the field labelled Typically starts with "ssh-rsa ...". Enter a name for your key and select Add key.

Paste SSH key
SourceTree
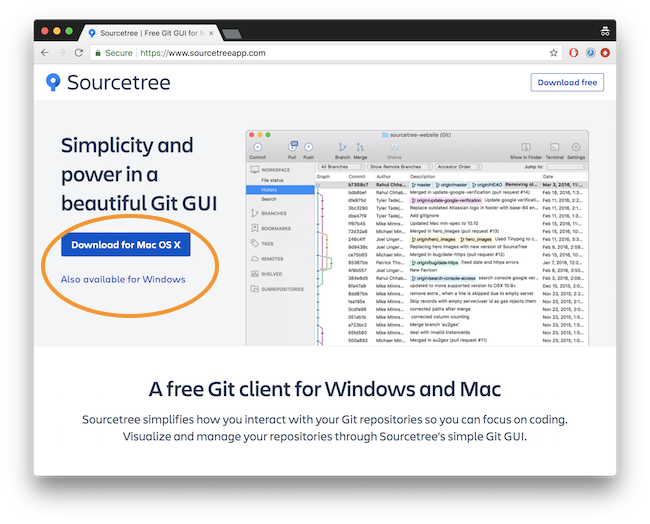
- Go to https://www.sourcetreeapp.com/, where you’ll be able to download SourceTree for your platform directly from the landing page (screenshot below). Otherwise click “Also available for …”.
macOS
- You will have downloaded a file named
Sourcetree_X.Y.Z.zip(e.g.Sourcetree_2.7.6.zip), into your Downloads folder (or, elsewhere if you had specified the destination). Unzip this file, and drag the resultingSourcetree.appinto your Applications folder. - Go to your Applications folder and double click the
Sourcetreeapplication icon to launch it.
Windows
You will have downloaded a file named
SourceTreeSetup-X.Y.Z.exe(e.g.SourceTreeSetup-2.6.10), in your Downloads folder (or, elsewhere if you had specified another destination). Open it, and it will automatically launch SourceTree.If/when SourceTree says that it cannot find an installation of Git, click the option to install an
Embedded version of Git.Enter the passphrase you came up with when you generated the SSH key.
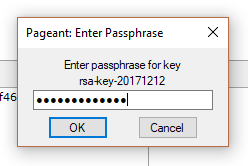
Enter passphrase for SourceTree
Creating a copy of mini-wlp
In this section, we will introduce some Git terminology while also setting up your own copy of the mini-wlp repository for the remaning part of the onboarding exercises. Iin fact, we’ll create two copies (we’ll clarify this shortly).
Create a fork of coedl/mini-wlp
First, go to https://gitlab.com/coedl/mini-wlp.
A common way to refer to a Git repository hosted on the web is via the host (e.g. GitLab, GitHub), the owner (e.g coedl), and the name of the project (e.g. mini-wlp): https://gitlab.com/coedl/mini-wlp. As a new member, you are currently unlikely to have write access to this mini-wlp owned by coedl.
However, as coedl/mini-wlp is a public repository, everyone has read access. So we can create a copy (a fork) by forking coedl/mini-wlp into your newly-created account, i.e. creating your-user-name/mini-wlp, to which you do have write access (note ‘fork’, just as ‘copy’, is both a noun and a verb; this type of conversion will be a recurring theme).
- To create a fork, first go to the address of the repository you wish to fork, i.e. https://gitlab.com/coedl/mini-wlp, where at you will find a
Forkbutton on the project home page.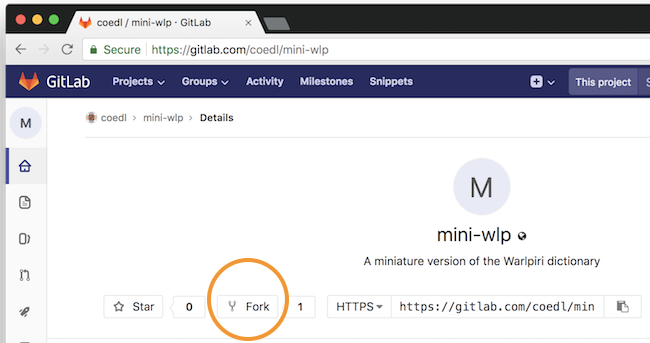
- You will be asked the namespace in which you want the fork to be created. Some accounts have multiple (e.g. personal vs. company, etc.), but your newly-created account will only have one, i.e.
your-user-name. Click on the only available namespace to continue.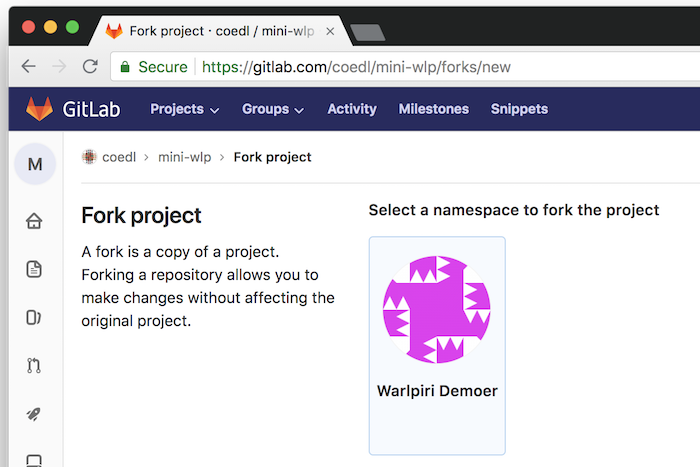
- You will now be presented with the fork you have just created, i.e.
your-user-name/mini-wlp. Notice that the address also reflects the ownership, which means a) you are free to modify this repository however you wish and b) these modifications will have no effect the original repository,coedl/mini-wlp.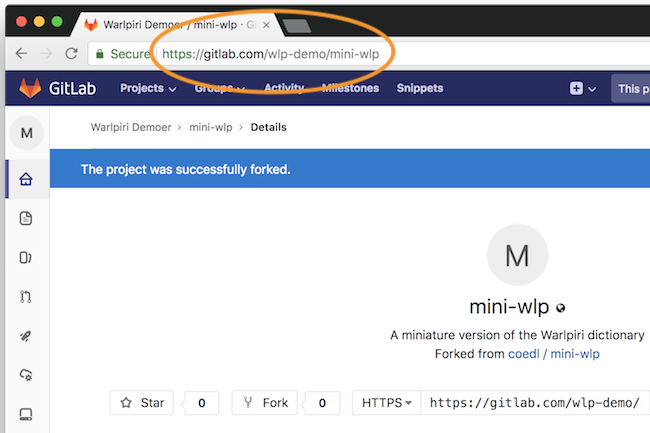
Clone your-user-name/mini-wlp to your computer
The 2nd copy of mini-wlp you will create is a local version of the GitLab repository your-user-name/mini-wlp. Creating this local version is cloning your-user-name/mini-wlp (or creating a clone thereof), and we will use SourceTree to help us do this.
Side note. Fork vs. clone meant different concepts historically (whether or not technically git implemented them differently), where ‘fork’ meant that you were creating a copy whose changes will not be merged back into the original repository, while ‘clone’ denoted that they would be (and you had permission to do this merge).
However, this distinction becomes less clear-cut with the advent of hosts such as GitHub and GitLab. For example, GitLab allows for forkers to request that changes in the forked repository be merged back into the original repository (via a merge request), so the historical concept of ‘fork’ may not always hold.
In our case, this distinction does hold, as we will only send changes you do on your cloned copy of your-user-name/mini-wlp back to the your forked copy on GitLab (and you have permission to do so, since you own it). These same changes received by your forked copy on GitLab, however, will not be merged back into coedl/mini-wlp, as we created the fork just for the onboarding exercise.
Retrieve the address of your forked
mini-wlprepository, by going to the main page of your repository (e.g.https://gitlab.com/your-user-name/mini-wlp), clickingSSHin the dropdown on the left of the address, and clicking theCopy URL to clipboardicon on the right of it: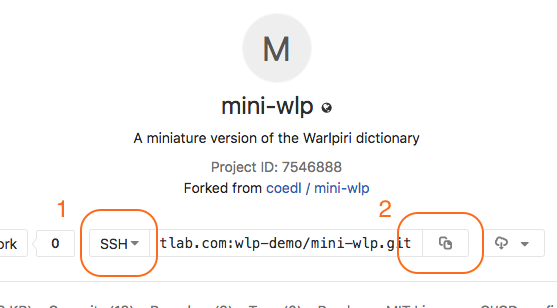
Switch from your browser to the SourceTree application. Click the
Filemenu, then clickNew..., and thenClone from URL. This will present you with the forms below. Paste the URL copied in step 1 into theSource URLfield, and the rest should be automatically completed by SourceTree for you (you may need to enter your GitLab account password). The default settings will suffice for this onboarding exercise. Note. Do take note of where theDestination Pathis.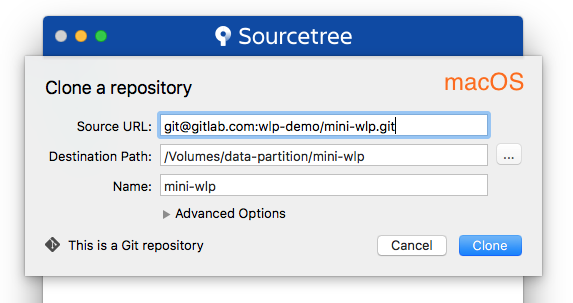
After SourceTree has completed cloning, it will open a new window showing the
Historyof the repository: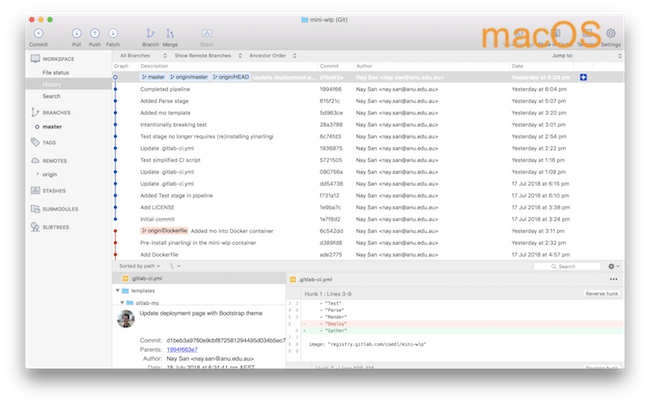
In your Finder (macOS) or Windows Explorer (Windows), you may browse to location of the
Destination Path(e.g./Volumes/data/mini-wlpin our Clone a repository form in Step 2), and see the files associated with the repository: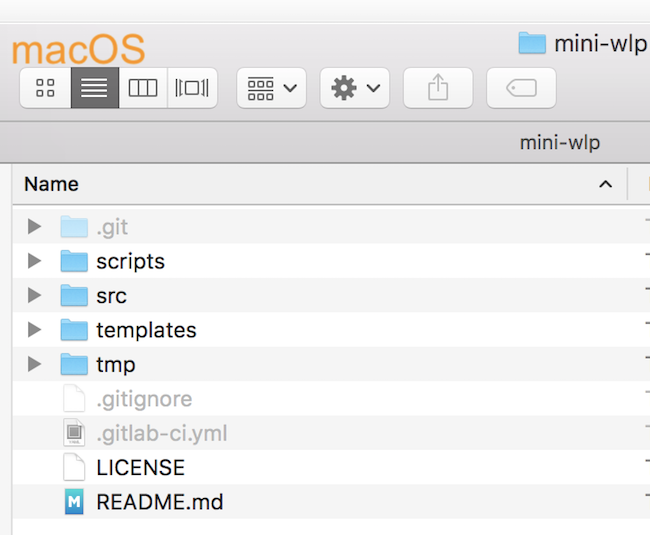
Congrats! 🎉🎉🎉 You are now ready to start making changes! Head to Git Workflow to for a tutorial of how to work with Git.