Google Colab is an online environment for writing and executing Python code through a browser interface. The scripts which are written and executed in Colab are also known as Colabs, or notebooks. Colabs are beneficial for working on shared coding projects, by sharing development or sharing script output in a way that other people can easily review. Colabs are excellent for the reproducability of research. Colabs are particularly useful for machine learning and data visualisation, as they come with pre-installed software including TensorFlow and PyTorch.
Colabs are based on open source Jupyter notebooks, which are web based applications which can be be used to share code, equations, visualisations. Google Colab extends Jupyter notebooks by providing virtual machines (for free) to run the scripts on. This avoids us having to download, install or run anything locally, other than a browser.
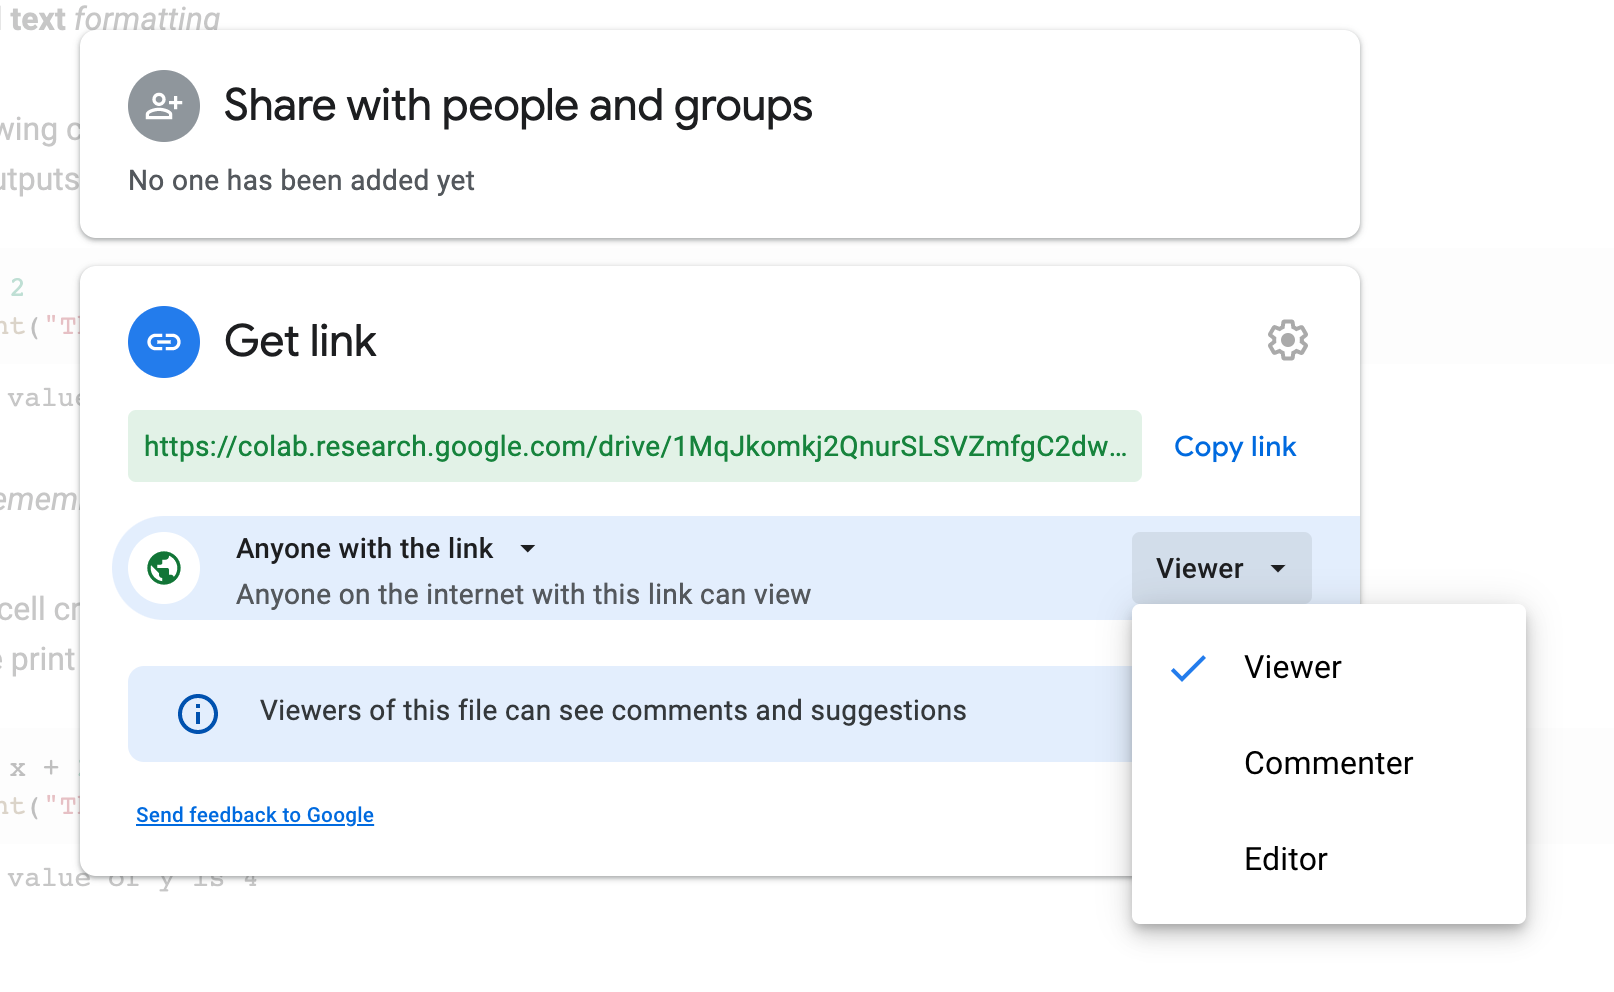
Colabs can be copied, shared and commented upon, depending on the permissions that the Colab has.
CPU and GPU/TPU machines are available. GPUs (Graphics Processing Unit) and TPUs (Tensor Processing Unit) are computer processor chips which are suited to running computationally intensive operations such as training neural networks and processing extremely large datasets. Neural networks are commonly used in language technologies. Colab GPU/TPU machines have a run time limit of 12 hours. Colab also provides CPU (Central Processing Units) machines which are akin to regular servers, and are suitable for non-intensive tasks.
When you open a Colab you will see a series of text and code blacks, also known as cells, along with output of the code from the last time the Colab was run. Text and code cells can be edited by double-clicking them.
Text cells can have simple formatting, using Markdown formatting tags.
Code in a Colab is shared between cells as though it was one single page of code. You can define methods, variables etc in one cell and access them in a later cell.
Output is displayed below a code cell.
To start using a Colab, sign into Google Colab with a Google account (create one if necessary).
When Colabs are shared, permission settings allow other people to view, comment or edit them. This intro colab has view permissions. Open the intro colab. You should see a message in the Colab toolbar “Cannot save changes”. You can edit cells and run them, but to save changes requires saving a copy, File > Save a copy in Drive. This will create a duplicate colab in your Google Drive under My Drive > Colab Notebooks and changes you make will be saved in your copy.
To set permissions for sharing your colab, click the Share button and change the “Get link” settings to Commenter or Editor as appropriate.
To run code, first the Colab must connect to a “runtime” virtual machine. This can be done by clicking in the run box next to a code cell [ ] or the Connect button at the top right of screen. This allocates a machine to the Colab.
To specify a GPU or TPU machine, change the runtime type in the Runtime menu item. GPU/TPU machines should only be needed for memory intensive programs.
Colab cells are run in order from the topmost cell to the bottom. Cells can be run individually by clicking the play button next to the cell. The play button shows in the run box when you hover over the cell.
To run all the cells, go to Runtime > Run all.
Cells can be moved by clicking the up/down arrows.
You can upload files to Colab, or share files from an existing Google drive. To upload files from your machine, first create the Colab and connect to a runtime. Then in the side menu, click the upload file icon to upload the file you want to work with. You can navigate the Colab virtual machine’s file system in the side menu. Using this method, files are uploaded into the current visible directory. By the way, the “sample data” folder that you see is at /content/sample_data.
Another method is to use Colab’s Python module to upload files. Try it with the following code, which will display a file upload box. Selecting a local file will load the file into the current virtual machine directory and display a progress report of the upload process.
from google.colab import files

uploaded = files.upload()

for file_name in uploaded.keys():
  print(f"uploaded {file_name}")
This code will prompt you for authentication, connect to your Google Drive storage and mount it at the given location. After the drive is mounted, the files in the drive are accessible in the Colab code.
from google.colab import drive
drive.mount('/content/drive')
Colab can write to the file system of the virtual machine. For example, the following code will create a new file in a folder in the root directory of the file system, and write text into the file.
with open("/tmp/my_file.txt", "w") as f:
  f.write("voyages in language technologies")
Further reading:
For more detail on working with files, see this Colab or this blog post.
This example will mount your Google Drive folder and read a CSV file.
colab_data.colab_data folder.import pandas
from google.colab import drive
drive.mount('/content/drive')
file_path = "/content/drive/MyDrive/colab_data/data.csv"
pandas.read_csv(file_path)
The code loads the Pandas data manipulation tool. In this example, we aren’t doing any data manipulation, we use it to read and display the CSV data.
Next, the drive module is imported. Drive.mount then authenticates your Google Drive account and mounts the folder, making it accessible in the Colab file system at the /content/drive path. File_path is the path to the CSV file, which is read (and displayed) by Pandas.
This technique can be used to access files that are already in your Google Drive, by replacing the file_path URL.
TIP: You don’t need to explicitly
print()things in Colab. It will display the output of the last line in the code cell.
Matplotlib is a handy package for showing plots or charts. The charts can be shown in the output area of a code cell. Try the following example to draw a line chart.
import matplotlib.pyplot as plt

x  = [1, 2, 3, 4, 5, 6, 7, 8, 9]
y = [1, 2, 3, 2, 1, 2, 3, 2, 1]
plt.plot(x, y, label="line L")

plt.xlabel("This is the x axis")
plt.ylabel("This is the y axis")
plt.title("My Line Graph")
plt.legend()
plt.show()
Further reading:
For more chart examples, see this Colab.
Colabs can display media such as audio in the notebook. Try the following code to display an audio player for an online mp3 file.
from IPython.display import Audio
Audio(url="https://www.xeno-canto.org/sounds/uploaded/OHGEFOWNMD/XC664130-rtbc%2007_41_07.mp3")
This audio is copyright James Lambert and used under Creative Commons Attribution-NonCommercial-NoDerivs 4.0 license.
Add to this section by forking the Voyages GitHub repository and submitting a Pull Request with your updates.
# https://pypi.python.org/pypi/pydot
!apt-get -qq install -y graphviz && pip install pydot
import pydot